Creating a page for your badges.
Table of Contents
1 Introduction
- We're now going to use everything you've learned so far to create a special page for your JavaScript badges.
- So you're focusing on the HTML and CSS, they have been provided for you.
- Download the HTML by Right Clicking Here and choosing to download the file.
- Download the CSS by Right Clicking Here and choosing to download the file.
- The first thing to do is to create a directory structure to store your work.
- Make a directory called
Badge-Page - Inside the
Badge-Pagedirectory, create one directory calledcss, another calledjsand one more calledbadges. - Place the Badges.html into the main directory.
- Place the badges.css into the css directory.
- Place the badges you have been awarded so far into the badges directory.
Code It
- Open up Badges.html in a text editor.
- Have a good luck through the html.
- You'll notice that there is no css there at all, instead there is this line.
<link type="text/css" rel="stylesheet" href="css/badges.css">
- This line tells the web browser that all the css can be found on a separate file.
- The file is called
badges.cssand is located in thecssdirectory. - This is a much neater way of creating web pages. First it tidies up your html and secondly it makes sure that lots of different pages can all access the same css file.
- Let's do the same for out JavaScript, and put it all in a separate file.
- Add this line to your html, jest below the link to the css.
<script language="javascript" type="text/javascript" src="js/badges.js"></script>
- This tells the browser that all the JavaScript can be found in the
jsdirectory and is calledbadges.js
Save It
- Save the file.
Run It
- Run the file in the browser.
- Nothing much should be displayed at the moment, so let's fix that.
Try It:
- At the moment there is a div in your HTML with the id
badges1 - Inside this div are some
<img>tags that don't really link to anything at the moment. - Change the
<img>tags so that they point to the badges you have earned while learning JavaScript. You should have 5 in total by now. - Make sure the page looks okay in a browser.
2 Creating a badges.js file
- Open up your web pages in a browser and then open the developers console.
- You should see an error message, along the lines that the javascript file can't be found.
- Let's fix that now.
Code It
- In your text editor save a blank file as
badges.jsin thejsdirectory you created earlier. - We'll test that it's all working correctly with a quick
console.log()
console.log('JavaScript loaded successfully')
Save It
- Save the .js file
Run It
- Refresh your browser and make sure that the console.log is being displayed.
3 Using Arrays
- The first thing we're going to want to do is to display the number of badges your have obtained.
- To do this you're going to need to know about arrays
- An array is an arrangement of items. Just think about a shopping list.
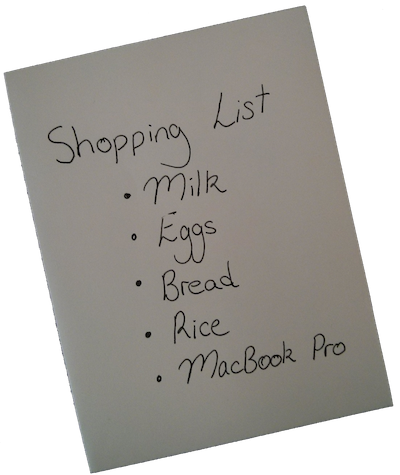
- In JavaScript we'd represent the shopping list like this:
shoppingList = ['Milk','Eggs','Bread','Rice','MacBook Pro']
Code It
- Let's create an Array and see what we can do with it.
- Delete the
console.log()from your .js file - Now lest create a new array
var listOfCats = ['Dave','Dee','Dozy','Beaky','Mick','Tich']
- You can find out what is at any position in an Array quite easily. Write this line below it.
console.log(listOfCats[3])
Save It
- Save the .js file.
Run It
- Refresh your browser. (Don't forget to look at the console)
- Which cat is printed out in the console?
- Is that the one you expected?
- In JavaScript the first element of an array is indexed - 0. We often call it the zeroth (0th) element. So when counting positions, you must start counting from 0.
Try It:
- Make sure you can console.log() all the cat names, using the array
Code It
- Now you have created and accessed an array, one thing that is really useful for a program to know, is the length of the array.
- This is actually really easy to do.
console.log(listOfCats.length)
- Add this line to your code, and you should see the number 6 printed out in the console, when you save the code and refresh the page.
4 Counting the badges
- We're now going to use an array to count the badges on your web-page.
- Before we start, let's have a quick look at the html of the web page again.
<div id = "badges1">
    <h3>JavaScript Badges</h3>
    <img src="badges/placeholder.png">
    <img src="badges/placeholder.png">
    <img src="badges/placeholder.png">
    <img src="badges/placeholder.png">
    <img src="badges/placeholder.png">
</div>
<input type="button" value="Calculate Progress" id='calcProgress'>
<div id="progressSection">
    <div id="textCount"></div>
- The three key areas we need to focus on are the
<div id = "badges1">, the<img>tags used to reference the images and lastly the<div id = "textCount">.
Code It
- Delete everything from your .js file.
- Declare a variable called
imageArrayon the first line. - Next we'll need a function that is called when the window loads.
window.onload = function()
{

};
- For now, all your code goes between the
{} - To assign the images to the variable you created, add this line of code.
imageArray = document.getElementById('badges1').getElementsByTagName('img');
- This code first accesses the
badges1div and then gets all the elements what use theimgtag. - Let's check this works by adding a
console.log(imageArray);
Save It
- Save your .js file
Run It
- Open the Badges.html file in a browser and check the console. You'll see different things depending on which browser you're using, but you should see an array being displayed.
Code It
- We're now going to use the
textCountdiv to display the number of badges (which is the length of the array.) - Let's grab the
textCountdiv. Put this code between the{}.
var textCount = document.getElementById('textCount');
- Now we can edit the innerHTML of the
textCountdiv
textCount.innerHTML = imageArray.length;
Save It
- Save your .js file
Run It
- Open the Badges.html file in a browser and check that the number of badges is being displayed.
Try It:
- Having the number on it's own doesn't give our user much information.
- Use concatenation (joining) to add some text to the innerHTML of the
textCount. Something along the lines of "Total Badges Gained", should do the trick.
5 Filling the progress bar
- Having a numerical indicator of progress is great, but a progress bar would be better.
- In the .html file there are the following lines of code.
<div id="progressBar">
    <div id="progressBarFill"></div>
progressBaris a container div andprogressBarFillis a div inside it that has been coloured white, using css.
Code It
- Let's have a play with the
progressBarFill, put this inside youronload = function{}code
document.getElementById('progressBarFill').style.width = '25%';
Save It
- Save the .js file
Run It
- Open the Badges.html in a browser.
Try It:
- Play around with different percentages for the progress bar.
Code It
- Now we want the bar to actually represent the progress you've made.
- Add a new variable declaration to your first line, so it reads as follows.
var imageArray, progress
- Declaring multiple variable on a single line saves us a bit of space.
- Within the
onloadfunction, we now want to work out the percentage of badges you're received and then change the width of theprogressBarFill. Edit your function so that it looks like the one below.
window.onload = function()
{
    imageArray = document.getElementById('badges1').getElementsByTagName('img');
    var textCount = document.getElementById('textCount');
    textCount.innerHTML = 'Total Badges gained = ' + imageArray.length;
    progress = imageArray.length/6*100;
    document.getElementById('progressBarFill').style.width = progress + '%';
};
Save It
- Save your code.
Run It
- Run it in the browser and check that it works.
- Try removing some of the image tags from the html file and see whether the progress bar changes in size.
6 Animating the fill
- We're now going to animate the fill bar.
Code It
- The basic concept is going to be to increase the width of the fill bar by 1% every 20 milliseconds.
- We'll start by using a function to handle the timing.
- At the top of your .js file declare a new variable called
fillPercent - Now, at the bottom of the .js file let's make a new function called
timer()
function timer()
{

};
- Inside the
timer()function we're going to want to assign the variable fillPercent the value 0, as the bar will start off with a width of 0.
fillPercent = 0
- Next we need a timing event inside the function. We'll use the timing event to call a function that we haven't written yet.
setInterval(function(){fillIt()},20;
- You'll finish the rest of this off in the Badge It section
7 Badge It
Task
To earn your final Blue JavaScript Badge, complete the tasks below. Once you have finished, ask your teacher to check your code to make sure it runs correctly.
- Create a new function called fillIt()
- Inside the function the first thing that should happen is fillPercent is incremented up by 1 (++)
- Next you'll need a conditional
ifbut noelse, that should check that fillPercent is less than progress. - If the condition is true then you'll need the line:
document.getElementById('progressBarFill').style.width = fillPercent+'%';
- Lastly, delete the line in the onload() function that fills the progress bar.
- Check that it's all working, and ask your teacher for your final badge.